Equip the four roles before entering the arena
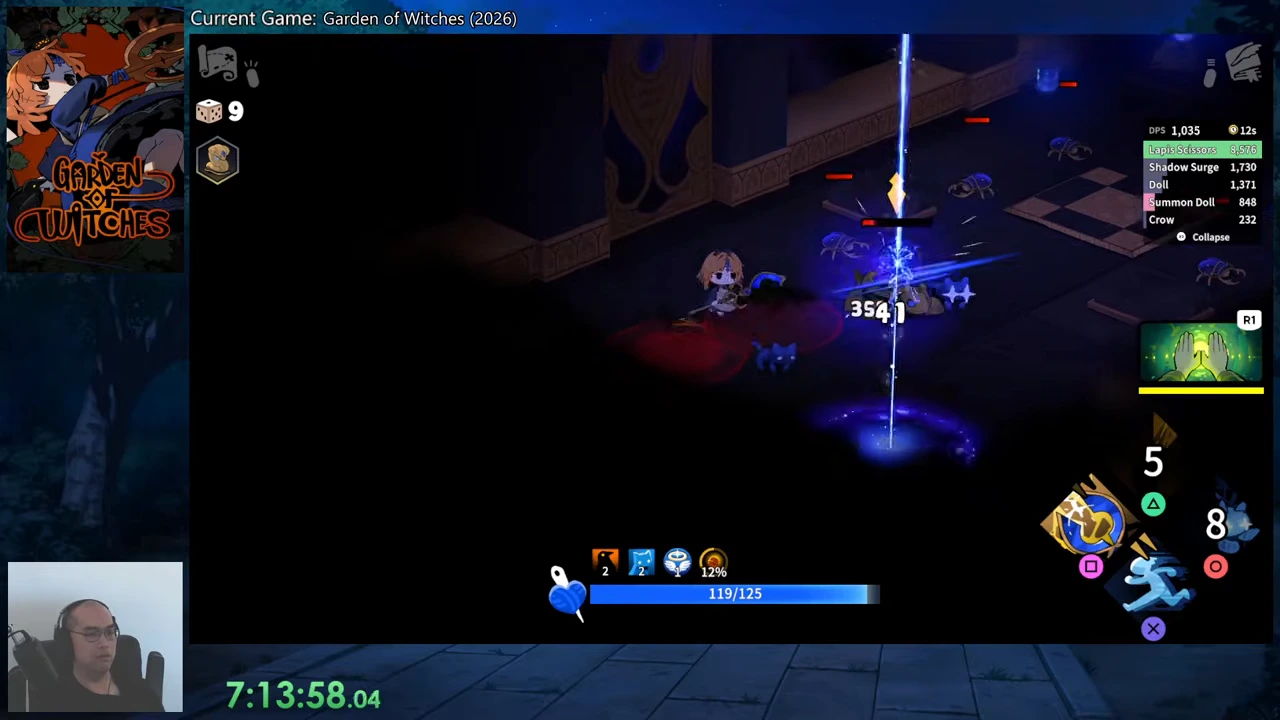
This setup is for a save that already has Lapis Scissors, Shadow Surge, Summon Doll and Swamp Breath available. The recorded Epilogue 2 combat HUD has all four equipped. You can save the same combination with the Crow support preset in the build planner.
CT602 uploaded this footage on September 4. The earlier Epilogue 2 segment does not expose its exact build; a later restart shows v1.0.2 before the Shadow Surge tooltip used below. Keep those two recorded contexts distinct. This guide is a playable mixed setup, without a claim that Crows provide most of its damage.
| Slot | Selection | Job |
|---|---|---|
| Weapon | Lapis Scissors | Charged weapon pressure between spell casts |
| Spell 1 | Shadow Surge | Piercing hit plus a Crow |
| Spell 2 | Summon Doll | Companion and active Mark on a target |
| Special | Swamp Breath | Recover cooldowns when the special is available |
Create new Crows instead of waiting for a permanent flock
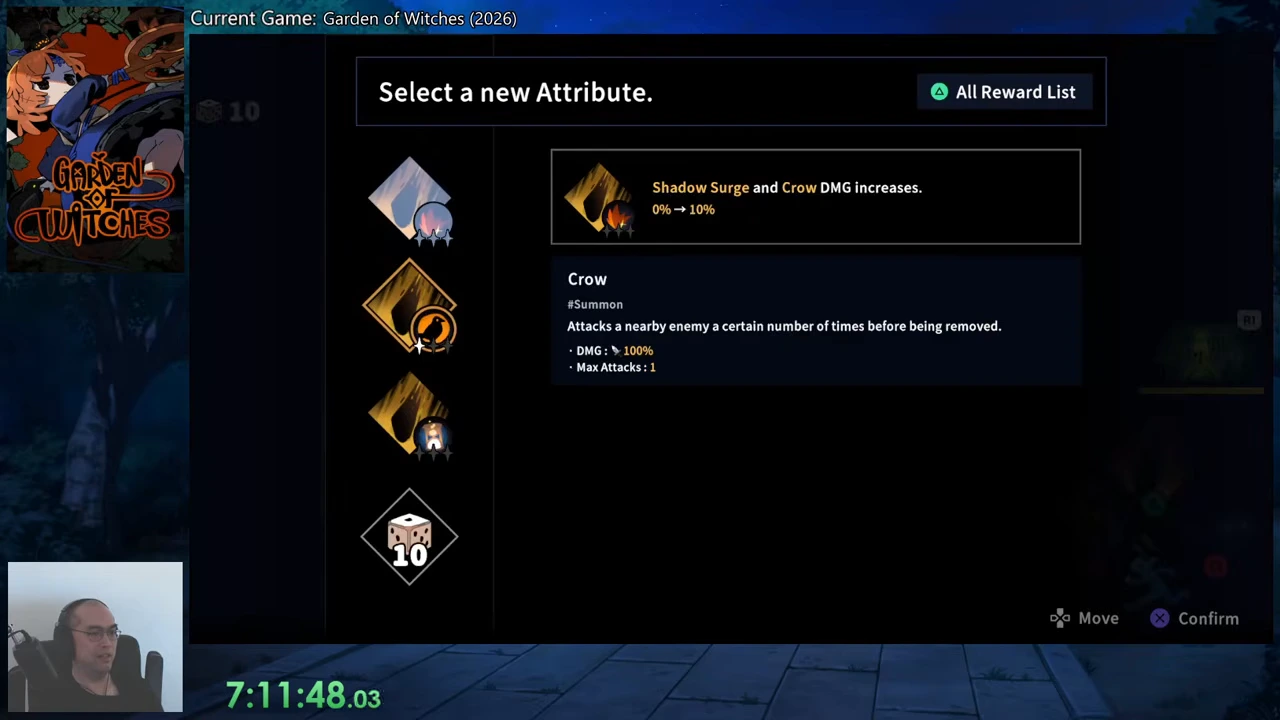
Aim Shadow Surge through enemies so the piercing projectile can connect, then let the summoned Crow attack a nearby enemy. The later v1.0.2 tooltip creates one Crow per cast, and its base Crow attacks once before being removed. A Crow disappearing after its attack is therefore expected in that displayed setup.
Cast again when the control is ready. Repeated casts create new summons; the base tooltip does not establish a lasting stack of Crows. The earlier run also shows Crow and Shadow Surge as separate entries in the combat breakdown, so a spell hit alone is not the same observation as a Crow contribution.
Use the weapon to activate Snake Statue
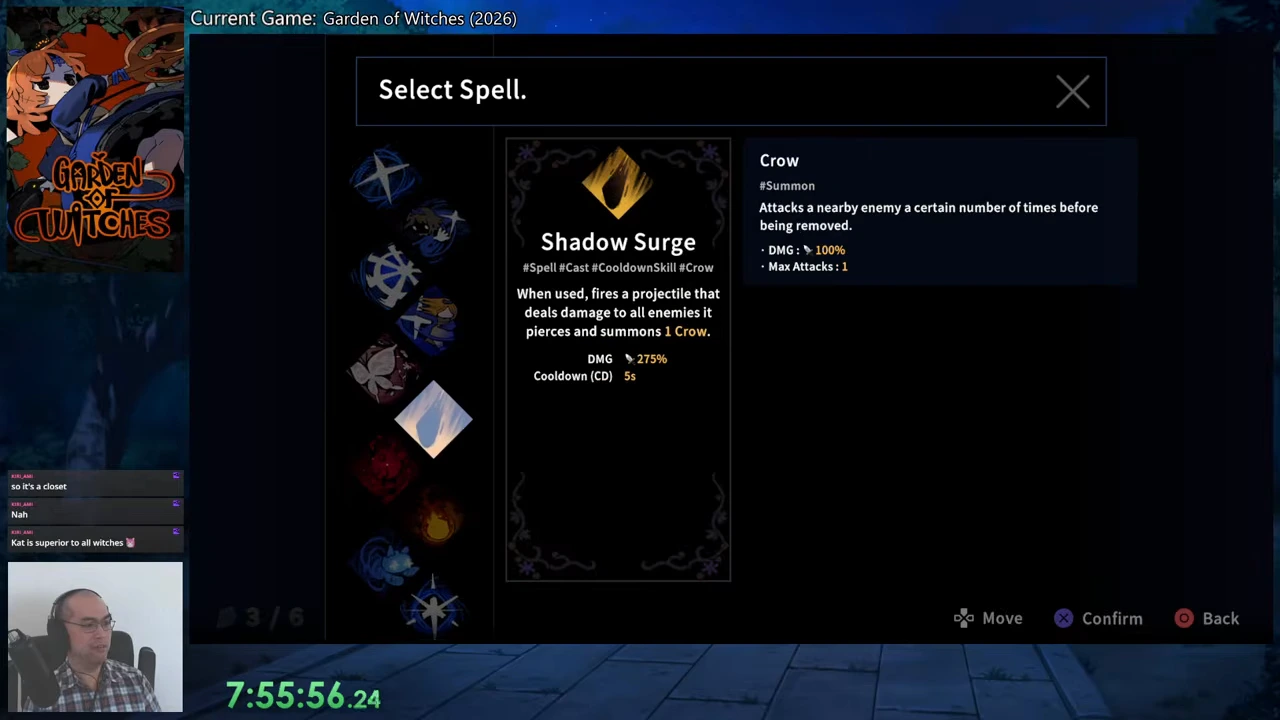
The recorded Snake Statue description grants 3% Power Boost when Lapis Scissors hits; a critical hit doubles that gain. Its Power Boost panel says it increases all damage based on the amount held and lists a four-second duration. The relic icon appears after the selection sequence, and the later combat HUD shows a 12% buff readout.
Keep landing Lapis hits while casting your spells. That is the named trigger you can act on. Do not substitute Crow hits for the weapon trigger or treat one 12% readout as a permanent bonus. This short buff is why the weapon remains part of the rotation even when your goal is to use summons.
Choose upgrades by the component they actually name
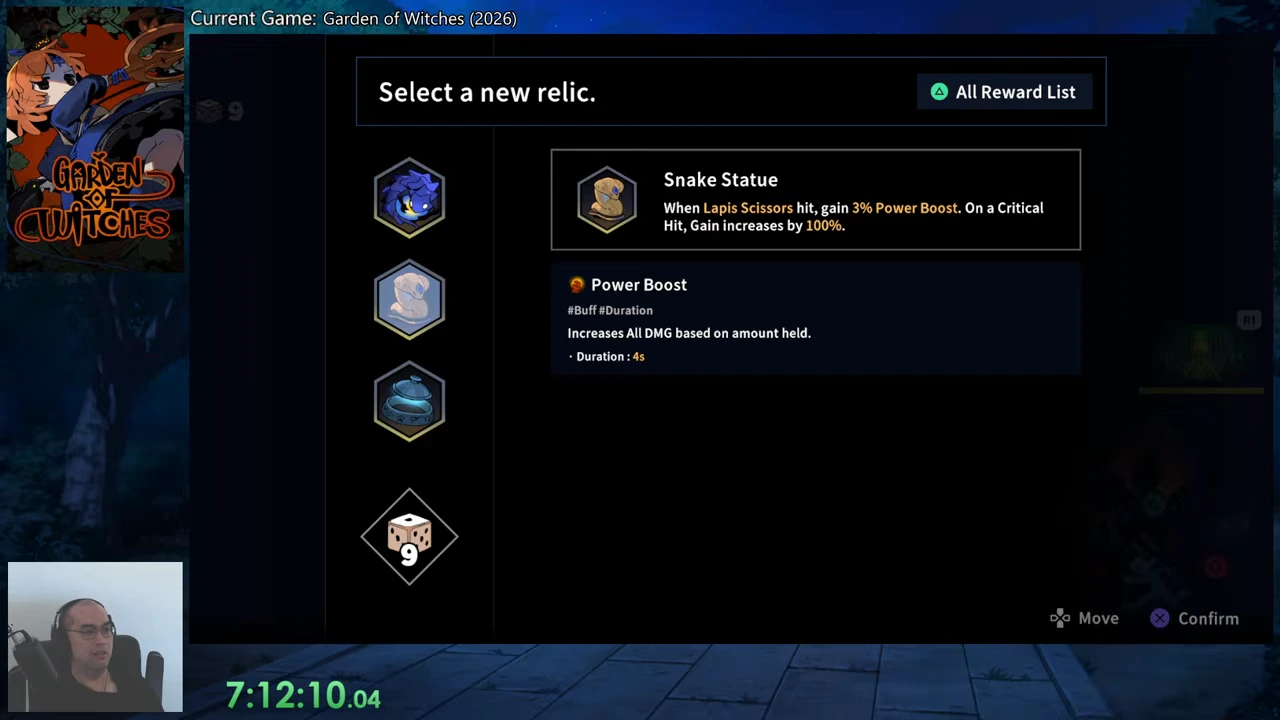
For direct Crow damage, the displayed attribute explicitly names both Shadow Surge and Crow. A different offered attribute reduces Shadow Surge cooldown. Choose the former when you want stronger hits from those named components; choose cooldown recovery when more frequent casts fit your available targets. Neither description says it increases the Crow’s base attack count.
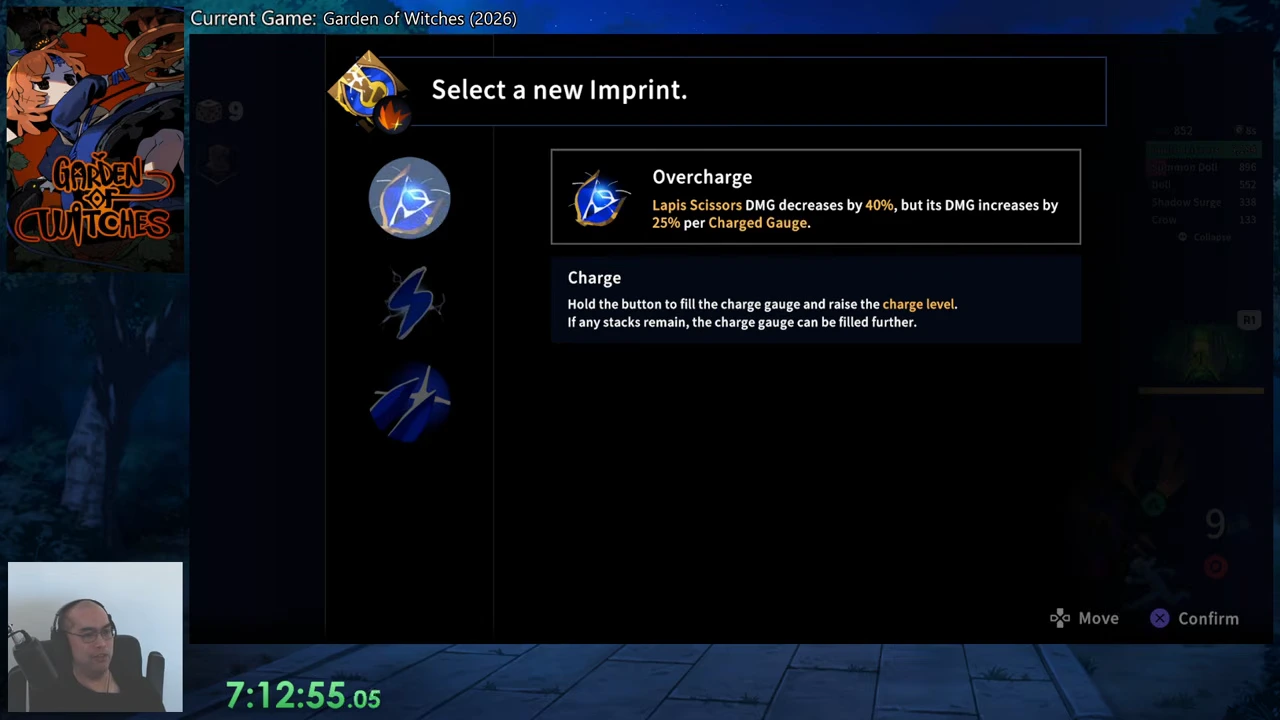
For the Lapis part of this setup, the shown Overcharge option trades 40% less Lapis damage for 25% more damage per charged gauge. Consider it when you can safely charge the weapon before release. It is a weapon option, not a Crow-specific Imprint, and this screenshot is a choice screen rather than a controlled comparison of both outcomes.
The run also offers and selects Gigantification for Summon Doll. Its description is about Large Dolls and other summoned Dolls. The Crow panel is tagged Summon, without a Doll tag. Do not count Crows as extra Dolls when reading that Imprint.
| Effect | What the observed text changes |
|---|---|
| Shadow Surge and Crow DMG attribute | Both the spell hit and Crow damage |
| Shadow Surge cooldown attribute | Time until another spell cast |
| Overcharge | Lapis Scissors damage and charged-gauge tradeoff |
| Gigantification | Dolls, not a stated Crow multiplier |
Charge only when the arena gives you time
Overcharge’s own panel tells you to hold the weapon control to fill the charge gauge. Use that window while enemies are between attacks, and release before staying still becomes unsafe. You do not need to wait on a weapon charge before every Shadow Surge cast.
The following sequence is suggested play based on the recorded skill roles. It is not a claim that the creator followed this exact order or cleared without taking damage.
- Open with Shadow Surge through an available enemy line to produce its hit and Crow.
- Use Summon Doll’s active on the target you can keep attacking, applying its Mark.
- Keep Lapis hits connecting; if Snake Statue is equipped, those weapon hits build the short Power Boost.
- Cast Shadow Surge again when ready rather than waiting beside a vanished Crow.
- Use Swamp Breath when its gauge is available and your cooldown skills need recovery, then resume their casts.
- Move out of new warnings before committing to another long weapon charge.
Read the Crow row separately from the other summons
In the pictured encounter, the breakdown lists Lapis Scissors, Shadow Surge, Doll, Summon Doll and Crow separately. All contribute, and Lapis is the largest entry in this example. Check the Crow line to establish that your summons are connecting; do not assign the weapon’s lightning or the Doll’s damage to that line.
A missing long-lived flock is not the same problem as a Crow never reaching an enemy. For the first, remember the displayed one-attack lifetime. For the second, use Shadow Surge with a nearby target available and inspect the next fight’s Crow entry. If weapon damage stalls while you wait for summons, return to Lapis attacks and the relic’s actual trigger.
This source supports the mixed setup and named effects above. It does not establish a Crow-only endgame chain, a nine-Crow threshold or a phantom-Crow upgrade. Those effects are not prerequisites for following this rotation.